Friday, 23 December 2016
2mm scale railway begins
Started the 2mm scale railway. Just waiting on some solder paste and I can start my first bit of 2mm pcb track work. 

Labels:
Model railway
Sunday, 18 December 2016
Learning for Christmas
Made a case for the SenseHat and Pi 3 to learn a bit more about this great hat!


Case cover from old MagPi printouts with access to the Pi from the top. I'm looking to cover the Pi using a clear removable cover.

I've used a Hak3r board to mount the SenseHat inside the laptop style case. This will for easy changing to another hat in the future.
Labels:
Raspi
Monday, 5 September 2016
Wow, what a summer!
It's been a while, but much has happened over the Summer. I have working on the CB250 cleaning and removing rust from parts. Work will continue but progress is slow - this is ok as its good to get some shed time. I have started yet another project an RC2014, this is a 'work' project to demonstrate how computers work to someone. The plan is to use the Pi Zero to control the Z80 processor and monitor address and data lines. I may add a wireless dongle so that I can interface using SSH.
FTDI hidden in the bottom of the base (cheap chopping board from Tesco) to allow for USB COM connection.
FTDI hidden in the bottom of the base (cheap chopping board from Tesco) to allow for USB COM connection.
Saturday, 11 June 2016
Speccy Finished
All done, and working!
I have also started work on the joystick for the arcade part of Retrobox.
I used a turbo tape loader wav file from my iPad to load Manic Miner. It loaded in just over 20 seconds!
Labels:
Zx spectrum
Tuesday, 7 June 2016
Monday, 6 June 2016
Saturday, 4 June 2016
ZX Spectrum clone
Rebuilding my old Speccy+ for the Retrobox. Using a clone board (Harleguin Rev G) and also installing a new keyboard membrane.
Labels:
Zx spectrum
Saturday, 21 May 2016
Wednesday, 4 May 2016
Sunday, 24 April 2016
Cleaning, Cleaning and more cleaning!
A before and after shot
Cleaning is slow going job, but the results are worth it. Looking at coating in zinc to protect the parts.
A another before and after for the seat mount
Labels:
CB250
Wednesday, 13 April 2016
Wednesday, 30 March 2016
Saturday, 26 March 2016
Three weeks in vinegar
The process is a little slow, but soaking parts in vinegar seems to remove most of the rust. This is going to be a very long process, but its very satisfying bringing the old parts back to life after many years being covered in rust. Once the nice weather makes an appearance then I can start painting some of the parts that are not going to be powder coated.
 |
Nice clean piston, ready for new rings
Labels:
CB250
Monday, 7 March 2016
Saturday, 5 March 2016
New bike, new tyre
I have repaired the switch on the instrument panel and have ordered a new rear tyre. I have a couple of other tidy-up jobs to do, then we can go for a ride.
Labels:
W650
Saturday, 13 February 2016
Sunday, 31 January 2016
Cheap parts cleaner
Until finances allow the purchase of a parts cleaner, I picked up a large plastic box to start cleaning the larger parts. Cleaned lots of parts this weekend, also used this months purchase (digital vernier calliper) to measure the clutch springs. Needless to say that need replacing!
In soak
Unknown parts found in the bottom of the plastic box.
Old gaskets removed and faces cleaned.
Labels:
CB250
Sunday, 24 January 2016
Shiny
Getting a little OCD with cleaning the parts, but its a good way of having some nice relaxing shed time at a weekend.
Most of my posts from now on, will be clean motorcycle parts!
Most of my posts from now on, will be clean motorcycle parts!
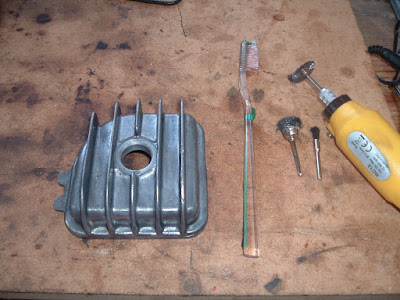
Tools used for cleaning - plus a large container of Gunk
Yes, and the bolts - told you I was getting a little OCD
Clean parts into a new bag, with diagram if necessary
All parts given a spray of WD40 to protect them before bagging
Labels:
CB250
Sunday, 17 January 2016
Saturday, 16 January 2016
Evil Pi
Project Evil Pi, (or PenPi) hardware all done. This is my Pi network security toolkit. I'm using Kali Linux, Fruity WiFi and some other tools. The Pi has been modified, removing most of the sockets and placing the wifi dongle in the case. I have added a small 16x2 LCD panel and some buttons.
Finished prototype case
Sockets removed and USB replaced with headers
SD card now on the back of the Pi
Labels:
PenPi
Saturday, 9 January 2016
Subscribe to:
Comments (Atom)


